Are you a business looking for a creative way to showcase your products? If so, you should consider setting up a product photoshoot. Product photography is an effective way to promote and showcase your brand, products, and services. A well-executed photoshoot can result in beautiful images that will grab the attention of potential customers. In this article, we'll provide you with tips and tricks on how to set up a product photoshoot and make the most of it.
What Equipment Is Needed?
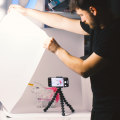
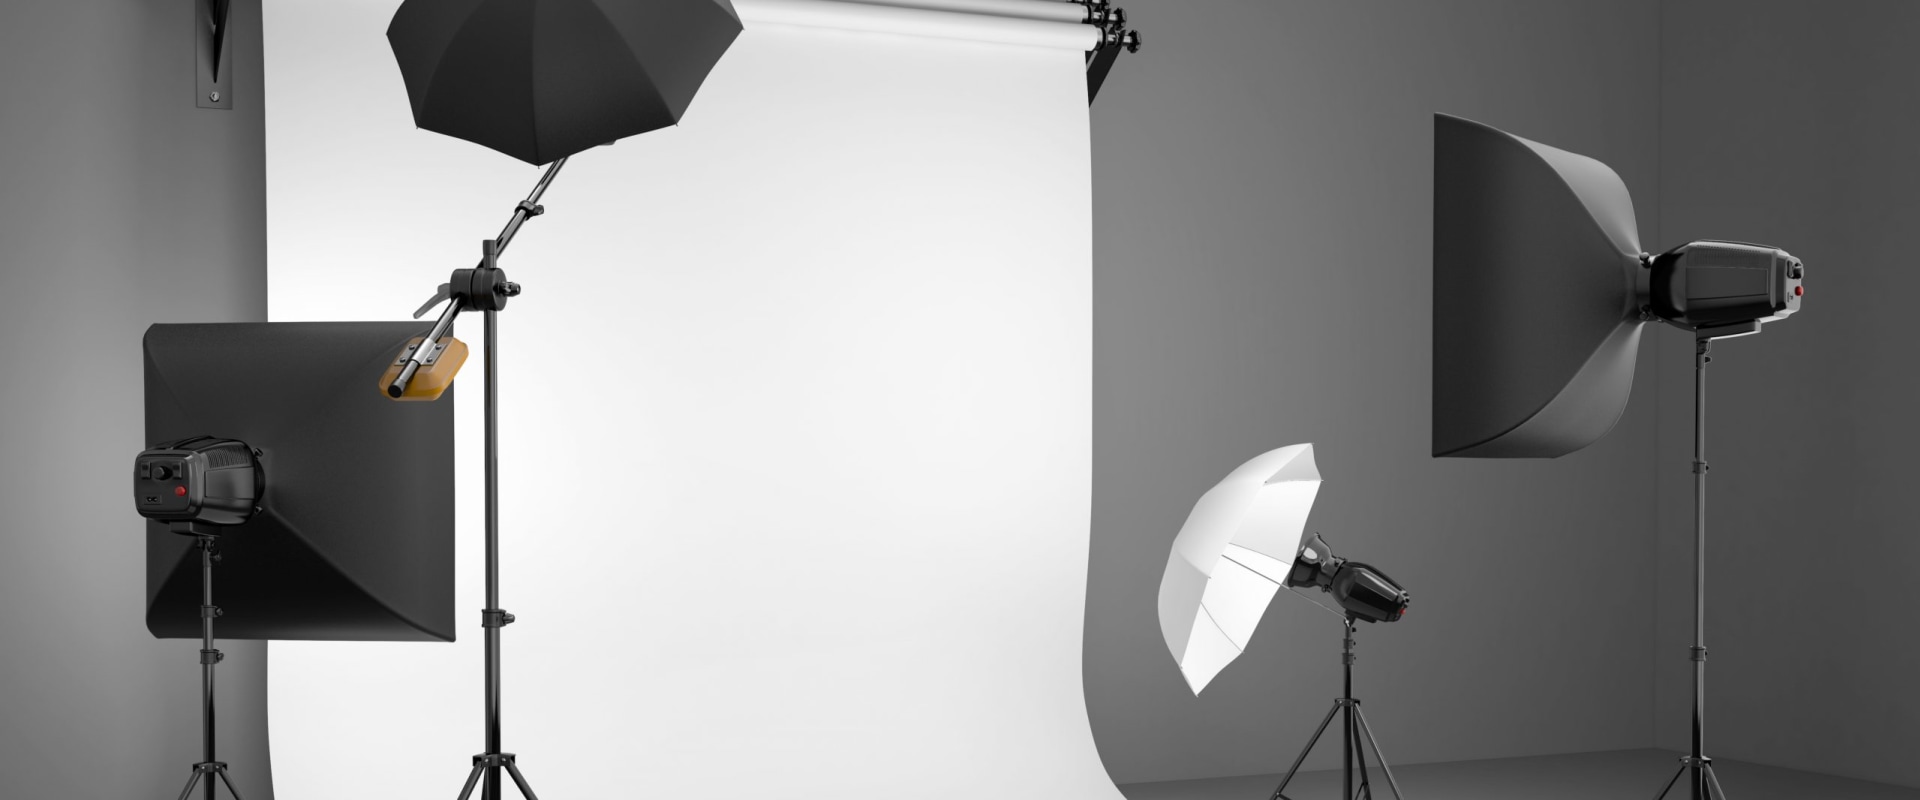
When setting up a product photoshoot, it’s important to have the right equipment for the job.You’ll need a camera, preferably a digital SLR camera. You may also want to use a tripod to help keep your shots steady. Additionally, you’ll need lenses to help get the right angle and zoom. You may also need lighting equipment, such as softboxes or umbrellas, to help create the perfect lighting for your photoshoot.
Choosing a Location When choosing a location for your product photoshoot, it’s important to consider the environment. You want to make sure that your background is not distracting and will help set the right tone for your images. Additionally, make sure that the space is large enough to fit all of your equipment and props.
Understanding Lighting
Lighting is one of the most important aspects of product photography.Natural light is often preferred, but if you need more control, you may want to use artificial lighting. If you are using artificial light, it’s important to understand how different types of lighting will affect the look of your images. Additionally, you’ll need to consider how the light will reflect off of your product.
Setting Up the Shot
Once you’ve chosen a location and understand the lighting, you can start setting up the shot.Make sure that all of your equipment is in place and that your background is properly set up. Additionally, you’ll need to arrange the product in a way that is visually appealing and will highlight the features of your product.
Capturing the Image
Once you’ve set up the shot, it’s time to start taking pictures. Take multiple shots from different angles and distances to ensure that you get the best images possible.Additionally, be sure to pay attention to the lighting and make any adjustments as needed.
Editing and Post-Production
After you’ve taken all of your images, it’s time to edit them for post-production. This includes adjusting color levels, cropping, and other adjustments to make sure that your images look their best. Additionally, you may want to add text or other elements to make your images stand out even more.Tips and Tricks for Successful Product Photography Taking successful product photos isn’t always easy, but there are some tips and tricks that can help you get better results. For example, make sure that the background isn’t too busy or distracting. Additionally, use props and other elements to help bring attention to your product. Also, take multiple shots from different angles to ensure that you get the best images possible.
Finally, don’t be afraid to experiment with different lighting setups and angles in order to find the best results.
Setting Up the Shot
In order to achieve the best possible results from a product photoshoot, it is important to set up the shot correctly. This includes choosing the right angles, composition, lighting, and any other elements that go into creating a successful image. When deciding on the angle of the shot, it is important to consider the product you are shooting. If you are shooting a small item, like jewelry or a watch, you may want to go for a close-up shot so that the details of the product can be seen clearly.On the other hand, if you are shooting something larger, like a car or a piece of furniture, you may want to use an overhead angle in order to show off its features. Composition is also an important part of setting up a product photoshoot. The composition should be carefully planned out in order to create a visually pleasing image. This can include placing objects in the background in order to create interesting shapes and patterns or using certain colors and textures to create contrast.
Lighting is another key element in setting up a product photoshoot. Natural light is often ideal for product photography, but depending on the product you may need to use artificial lighting as well. Different lighting techniques can be used to create different effects, such as soft lighting for a subtle look or harsh lighting for a more dramatic effect. By taking the time to properly set up the shot for your product photoshoot, you can ensure that you get the professional-looking images you need. By considering angles, composition, and lighting, and any other elements that go into creating a successful image, you can make sure that your product photos will look great.
Editing and Post-Production
After you have captured the images you need for your product photoshoot, the next step is editing and post-production.Editing and post-processing are essential for achieving the professional results you desire. Retouching, color correction, and other techniques can all be used to create high-quality images that will help promote your product. Retouching is used to enhance the image, making it look more polished and professional. This can involve removing blemishes or distractions, brightening colors, or adjusting the contrast of the image. Color correction is also important, as it ensures that the colors in the image appear natural and consistent. Other techniques used in post-production include cropping and resizing the image, adding text or graphics to the image, or adding special effects.
All these techniques can help create a visually stunning image that will draw the attention of potential customers. By taking the time to edit and post-process your images, you can ensure that your product photography looks its best and accurately represents your product.
Tips and Tricks for Successful Product Photography
Choose the Right Location - Finding the right space to shoot your product is key. Look for an area that has good natural light, and if shooting outdoors, find a spot with a consistent lighting source. You should also consider the backdrop of the photo - the right background can help draw attention to your product and make it stand out.Consider the Camera Settings
- The quality of your final image will depend on the camera settings used during the shoot. Make sure you understand how to adjust aperture, shutter speed, ISO, and white balance, and experiment with different settings to get the best results.Lighting Techniques
- Lighting is one of the most important aspects of product photography.Natural light is ideal, but if you don’t have access to it, try using a reflector or diffuser to bring more light into the shot. You can also use a tripod to help steady the camera and keep your shots consistent.
Take Multiple Shots
- Taking multiple shots of your product from different angles helps ensure that you capture all of its features. This will give you more options when editing, and can also help you create an interesting visual story for your audience.Edit for Quality
- Editing is essential for achieving high-quality product photos. Pay attention to details such as color correction, sharpening, and cropping to make sure that your photos look professional and polished.Capturing the Image
When setting up a product photoshoot, capturing the image is one of the most important steps.It’s essential to get the perfect shot every time, and there are some tips you can use to ensure that you get it right. First, choose a background that will bring out the best features of your product. A plain white or light gray background is usually best for product photography, as it keeps the focus on the item itself. If you’re working with a larger item, consider setting up a backdrop that will provide more context for the shot.
Make sure that the lighting is even and flattering. Natural light is best for product photography, as it provides a soft illumination. Try to avoid direct sunlight, as this can create harsh shadows and glare. If you’re using artificial lighting, opt for softboxes or umbrellas to diffuse the light and create an even illumination.
Once you have your background and lighting sorted out, it’s time to focus on the product itself. Make sure that it’s centered in the frame and that all of its features are clearly visible. You may also want to adjust the angle of the shot to highlight different aspects of the product. Finally, use editing software to touch up your image.
This can help to make your product look more polished and professional. Be careful not to over-edit, however, as this can detract from the natural look of your product.
Understanding Lighting
Lighting is one of the key components of product photography, as it can drastically influence the quality of your images. When setting up a product photoshoot, it’s important to understand how to use different types of lighting to your advantage. Natural light, artificial light, and any other types of lighting can all be used to create the perfect image.Natural Light
- Natural light is often the best choice for product photography, as it gives a softer, more natural look to the photos.When using natural light, make sure that you have enough of it coming in at the right angle in order to get the most flattering shots. Be aware that natural light changes throughout the day, so you may need to adjust your lighting accordingly.
Artificial Light
- Artificial light is often used in product photography when natural light is not available or not ideal. Artificial light typically comes from studio lights or flashes, and can be adjusted and manipulated to provide the perfect amount of illumination for your shots. When using artificial light, it’s important to be aware of color temperature and how it affects the overall look of your photos.Other Types of Lighting
- Depending on the type of product you’re photographing, you may want to consider other types of lighting, such as backlighting or side lighting.These types of lighting can be used to add depth and dimension to your images, helping them stand out from the crowd. Additionally, special effects such as gels and filters can help you create unique looks for your product photos.
Choosing a Location
When it comes to setting up a product photoshoot, one of the most important factors to consider is the location. Depending on the product, you may wish to choose either an indoor or outdoor space, and each has its own advantages and disadvantages. When shooting indoors, you'll have more control over the lighting and background, and you can make use of backdrops and props to create the perfect aesthetic.However, you may be limited in terms of the size of the product you can shoot, as well as any restrictions in terms of access or other factors. Outdoor photoshoots offer a more natural aesthetic, but there will be more factors to consider in terms of lighting and weather. You may also need to take into account any restrictions on the use of public spaces or any other local regulations. In either case, it's important to consider the specific needs of your product when choosing a location.
For example, if you're shooting a large item, you'll need to make sure that the space is big enough for it. Additionally, you should make sure that the background and lighting are appropriate for the product and the intended use of the images. Finally, it's important to consider any props or backdrops you may need for your photoshoot. If shooting indoors, you may wish to use a white backdrop or add props such as plants or furniture to create a particular aesthetic.
For outdoor shoots, you may need to bring your own props or find a suitable location with interesting features that can be used as part of the shoot.
What Equipment Is Needed?
Setting up a product photoshoot requires more than just a camera and a few lights. To get the professional-looking images you need, there are several essential pieces of equipment that you should consider. These include the camera, lenses, lighting equipment, and any additional items such as backdrops or props.Camera:
The camera is the most important piece of equipment for any product photoshoot. When choosing a camera, it’s important to consider the type of photos you’re trying to take.For more professional-looking images, a digital SLR camera or a mirrorless camera is recommended.
Lenses:
The lens you choose will depend on the type of product you’re photographing. For smaller objects like jewelry or watches, a macro lens is best. For larger objects, such as furniture or cars, a wide-angle lens may be more suitable.Lighting:
Lighting plays an important role in any photoshoot. Natural light can be used, but it can be unpredictable and inconsistent.For more control over your photos, consider using studio lighting equipment such as softboxes or LED panels.
Additional Equipment:
Depending on what you’re photographing and the look you’re going for, there may be some additional equipment needed. This could include things like backdrops, stands, props, or reflectors. It’s important to consider these items in advance to ensure that your photoshoot goes as smoothly as possible. Product photography is an important tool for any business, and setting up a photoshoot correctly is essential to get the best possible results. It’s important to have the right equipment, choose an appropriate location, understand the lighting, and set up the shot.Capturing the image, editing it, and post-production are also important parts of the process. With these tips and tricks in mind, readers can get started on creating their own successful product photoshoot. Experiment with different techniques and find what works best for them.