In the world of photography, retouching photos after the photoshoot is a vital part of the post-production process. It can help to ensure that the images you take are as professional and polished as possible. In this article, we’ll explore the basics of retouching photos after the photoshoot and provide some tips on how to get the most out of your shoot. From correcting exposure to color correction, and from sharpening to dodging and burning, we’ll look at different techniques that will help you achieve the perfect image. The first step in post-production is to review the photos you have taken.
Take some time to look at each photo and decide which ones you want to retouch. Once you have selected the photos you want to work on, you can start retouching them. Some of the common post-production techniques include color correction, cropping, and background removal. You may also want to adjust the contrast or brightness of your images. When it comes to color correction, it is important to make sure that the colors in your photos are accurate and true to life.
You can do this by adjusting the hue, saturation, and brightness levels. Additionally, you may want to adjust the white balance in your photos for a more natural look. Cropping is another important post-production technique. Cropping allows you to remove any unnecessary elements from your photos, such as distracting objects or people in the background. You can also use cropping to change the composition of your photos and focus on certain elements. Background removal is also an important post-production technique.
This technique allows you to remove any unwanted elements from your photos, such as buildings or trees in the background. This technique can help create a cleaner and more professional look for your images. Finally, you may want to adjust the contrast and brightness levels of your photos for a more polished look. By increasing the contrast, you can make darker areas stand out more while decreasing the brightness can make lighter areas stand out more. These are just some of the post-production techniques that can help you get the most out of your photos after a photoshoot. With practice and experimentation, you can become an expert at retouching photos and creating stunning visuals.
Color Correction
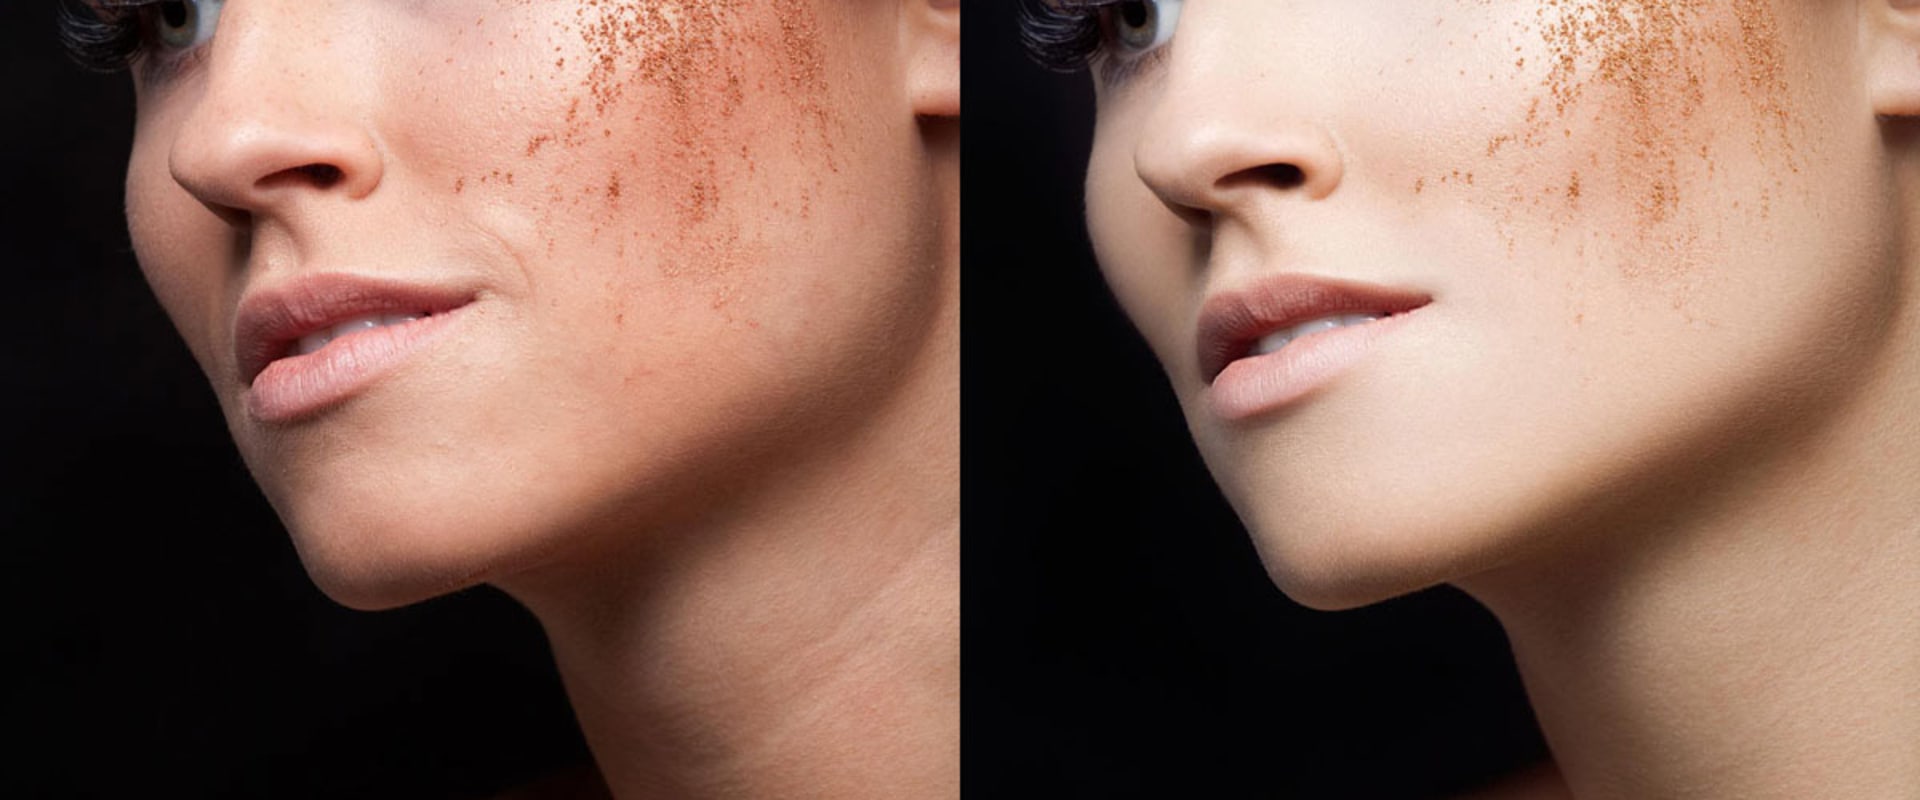
Color correction is an important step in post-production that can help you achieve accurate colors in your images.By adjusting the hue, saturation, and brightness levels of your photos, you can get the desired look.
Hue
is the color of light and can be adjusted to change the colors in your image.Saturation
is the intensity of a color, and it can be used to make colors more vibrant or muted. Lastly, brightness adjusts the luminance of an image and can be used to make an image brighter or darker.When retouching photos after a photoshoot, it's important to pay attention to the colors in your image. Color correction techniques such as adjusting hue, saturation, and brightness can help you create stunning visuals that accurately reflect your vision.
Contrast and Brightness Adjustment
Finally, you may want to adjust the contrast and brightness levels of your photos for a more polished look. Increasing the contrast can make darker areas stand out more while decreasing the brightness can make lighter areas stand out more. To increase contrast, you can use image editing tools like the Curves tool in Photoshop or Lightroom.This tool allows you to adjust the black point, midpoint, and white point of an image. You can also adjust the brightness of your photos by using the Levels tool or the Exposure adjustment in Lightroom. When adjusting the contrast and brightness of an image, it is important to be mindful of the overall composition and aesthetic. Don't be afraid to experiment and make adjustments to find the look that you want. Also, if you are shooting in RAW, you will have much more flexibility when it comes to adjusting contrast and brightness levels.
Cropping
Cropping is an essential post-production technique that allows you to remove unwanted elements from your photos and create a better composition.When done correctly, cropping can help you remove distracting objects and people in the background, as well as draw the viewer's attention to the important elements in the photo. It can also help you adjust the overall composition of the shot, allowing you to capture the perfect moment. When it comes to cropping, it's important to keep an eye on the framing. Make sure that you don't crop out any important parts of the image and that you don't cut off any essential parts of the subject.
Additionally, it's important to consider the aspect ratio when cropping. You want to make sure that your composition is balanced, so try to stick to standard aspect ratios like 3:2 or 4:3.It's also important to remember that cropping doesn't have to be limited to just removing elements from your photos. You can also use cropping to reframe the shot and create interesting compositions. Try experimenting with different crops and see what works best for your photo.
Background Removal
Background removal is another important post-production technique that can help create a cleaner and more professional look for your images.You can use this technique to remove any unwanted elements from your photos. Whether it be a person, a sign, or any other distracting elements, this technique can help make your photos look much more polished and professional. There are several different ways to remove the background from an image. For example, you can use a graphic design program such as Adobe Photoshop or Adobe Illustrator to erase the background from your photo. Alternatively, you can use online tools such as Clipping Magic or Background Burner to automatically remove the background from your images with just a few clicks.
Whichever method you choose, it’s important to make sure that you are using the right tools for the job so that you can get the best results. When it comes to removing the background from an image, it’s important to pay attention to the details. Make sure to check for any stray pixels or jagged edges that may be left behind when you erase the background. You should also make sure that there are no distracting elements that remain in the photo after the background removal process is complete. Finally, remember that background removal is not just about making an image look cleaner. It can also be used to isolate subjects in your photos and create more interesting compositions.
So don’t be afraid to experiment with different techniques to get the most out of your images. Retouching photos after a photoshoot is a great way to bring your images to life and create stunning visuals. From color correction, cropping, background removal, contrast and brightness adjustment, there are many post-production techniques that can help you get the most out of your photos. With practice and experimentation, you can become an expert at retouching photos and creating stunning visuals.